Jennifer Wasco, DNP – Assistant Professor of Nursing

Project Overview

Year 1 Project:

Title: So, you have been asked to be a Chatham University DNP Nursing Preceptor!

Challenge: Throughout the years, newly admitted DNP students have requested information they could provide to a potential DNP preceptor as soon as they received acceptance letters, deposited, and registered.

Students coming into the program understand they need a preceptor through high-level discussions with admissions.  Many of the students want to get an early start on securing this mentor. However, they did not know the requirements and responsibilities to start this process – or even how to ask someone to fulfill this role.  The preceptorship is not a 1:1 preceptorship as when they were pre-licensure and learning clinical skills-based training.

The students received a complete orientation and access to valuable resources.  However, during the summer months, the administrative faculty and staff update the orientations and handbooks.  These items are not often ready to go live until closer to the start of the fall semester, not when the student is accepted, deposits, and registers.

Therefore, it was determined if a stand-alone interactive “magazine” could be provided to the newly admitted student to provide to their preceptor, the tool would allow for a conversation, and finally, the “ask” to securing a commitment. The platform called ISSUU appeared to be a great fit. The technology was attractive because it leveraged flipbook technology vs. using a traditional static PDF to disseminate information. Upon closer review, ISSUU did not end up being an optimal choice. It was discovered that the end product needed to be embedded into a public website or posted on social media.

Therefore, another product was identified, called Canva.  Canva is an online design and publishing tool.  It was straightforward to use, and I enjoyed it so much, I upgraded to a pro-version to create facts sheets for a qualitative research study I am leading.

The end result was not a “magazine” but a “newsletter” that allowed students to give information to their potential preceptors.  There are live links within the document.  The newsletter is not as dynamic as I had hoped, but it made the information easy to read, inviting, and professional looking.

Project Planning

The planning consisted of identifying an issue that existed with the onboarding of new DNP students (I embraced my spirit of inquiry – channeling EBP!).  I knew another approach to the existing workflow had to exist.  To improve efficiency, emailing each student anytime they had a question became very time-consuming, especially when I reflected back on the student questions and saw repeating themes.  Therefore, a newsletter was created listing common, historical FAQ’s. The professional goal was to provide the students with the information they were seeking in a comprehensive manner and improve professional satisfaction with the workflow for the practice experience team.  Basic project management concepts were used, creating a timeline for identification of a solution (initiating), collection of FAQs, and the development of the newsletter (planning), and then setting a date for go-live (executing).  Timing was important, as we only have admissions for the DNP program twice per year (fall and spring), there was no cost associated with the intervention. Finally, having a deliverable (scope) was key to address this common request from incoming students.

Project Implementation

The implementation of the tools use was very simple.  The majority of the work went into identifying the best tool to get the “job done” and then the actual build of the newsletter pulling from historical inquiries from the students and learning the how to utilize the features of Canva. The implementation was quite simple – any time a student emailed with questions, we provided them the handout.  Then, when official welcome emails were sent from the Practice Experience Team, we attached the newsletter to that welcome email.

Project Assessment

I assessed my project informally.  When I provided the student the newsletter, many of them would email me back and tell me how valuable the tool was. It was exactly what they were looking for to assist with the process of securing a preceptor and understanding next steps.

Project Reflections and Next Steps

I feel that I had big ideas, and COVID-19 did put a hamper on having more than one idea to explore during my time in Technology Fellows.  I would have loved to implement a magazine. However, that did not work out.  I have learned that you need to be flexible anytime when implementing something new, as life can throw you lemons!


Dr. Nataliya Myshakina – Chemistry

Project Overview

Project 1: Use of Turnitin tool in Writing Intensive Course

I used several instruments implemented in Turnitin to help my students to develop their skills in writing scientific reports and reviews.

  1. Instead of writing a big report after completing laboratory experiment I asked students to submit pre-lab assignment which included scientific background, objectives for the experiment, working hypothesis, and a flow chart of major steps of the experimental procedure.
  2. Grading checklist/rubric was provided to students as soon as the assignment was posted, so students knew what expectations are, and what I am particularly looking for in their pre-lab write-ups.
  3. Peer-Review Assignments. As a part of the pre-lab assignment, each student was asked to read the other student’s work and provide feedback on that. To help students to analyze the work of their peers better, I provided students with questions which they needed to answer while analyzing someone’s work.
  4. Pre-lab graded and feedback was provided to students before they were asked to submit their full laboratory report.
  5. After completing the laboratory experiment, and discussing various aspects of the experiment in class, students had a chance to make any corrections to pre-lab parts of their reports, and then complete the remaining part of their report with Results, Discussion, and Conclusion sections.
  6. Grading checklist was provided to students for full lab report assignment to provide students guidance and clarify expectations

Project 2: Use of Problem-Solving Videos in First Year Chemistry Courses

Many students (first year and more senior students alike) search internet sources to watch practice videos on problems/questions solved in class. There are not always suitable or similar examples could be found on Internet, that is why I decided to create my own library of instructional videos which will explain problems/questions very similar to those covered in class and used in tests or exams.

Project Planning

Project 1. First, I re-visited my expectations on lab report assignments. Based on that I have created a general grading check-list for pre-lab assignment and for a complete laboratory report. I considered how typical research article is organized and wanted my students to recognize essential parts of research articles, what information each part contains and be able to write their reports in a similarity to a research article. I also wanted my students to analyze their own work, fix it as needed, that is why instead of one lab report assignment, I split it into two parts. I wanted students to see examples of other student’s work and learn from it, how they can improve their own writing, or be able to see flaws in someone else’s work and suggests ways to improve it. To achieve these  I created Peer Review assignments and give students a questionnaire to help them with the analysis.  I implemented Bloom’s model of integration, in which students learn information, then they apply that information to write their reports, and last they use their skills to analyze their own work, work of their peers, and suggest or find ways how to improve their work.

Project 2. I have selected topics, which students find particularly difficult, and then selected representative problems for these topics I want my students to see being solved. On the next step, I learned how I can record the videos and share those videos with my students via the course Moodle page.

Project Implementation

Project 1. I didn’t have any big difficulties with this projects, except some small technical Turnitin settings which I needed to set up in a particular way, so my students will have an excess to grading checklists on time or be able to access their peer’s assignments for review.

I didn’t actually have plan B, since the actual use of technology was outside of the classroom, not limited by the class period, and I had time and flexibility to adjust some project aspects.

For example, at the beginning of the semester when I still learning Turnitin, I choose wrong settings for Peer Review assignment and students could not access the assignment on time. As soon, as I learn it, I extended the assignment due date to give students sufficient timeframe to complete the assignment.

Project 2.  I did have some technical difficulties here. First, was the clicking noise of Apple Pencil which appeared very destructive on recorded videos. Use of external microphone helped me to overcome this issue. Next, was the choice of application which will provide the right canvas for writing with the iPencil. I have tried a few different applications and found GoodNotes be the most convenient for what I was planning to do. Last, but not least, was the way to record videos and share them. First, we planned to use Zoom, but after a few trials with Becky, we found it difficult to use. We tried recording videos using iPad screen recording, and then deposit those videos on Panopto and this worked just fine.

Project Assessment

For now, I have assessed both of my projects only informally. Developing an assessment tool for both of these projects is my goal for next year.

Informal assessment :

Project 1 (CHM340/BIO440 Macromolecules Laboratory, implemented in Fall 2018)

  1. More reports submitted on time
  2. Positive student feedback via course evaluations
  3. Paperless grading allowed for a faster turn out of submitted/graded assignments

Project 2 (CHM107 General Chemistry I and CHM108 General Chemistry II, in progress Spring 2019)

  • No assessment yet, plan to compare Final test results from this year to Final results from last year

Project Reflections and Next Steps

Project 1

  1. I will add more details to grading checklists, make them more specific for each lab experiment
  2. I will create student’s reflection questionary for the beginning and the end of the semester to help students to identify their goals in the development of academic writing skills in the beginning of the semester and reflect on the achievement of these goals at the end of the semester.

Project 2 

  1. I will continue to expand my library of videos.
  2. I will work on an assessment plan.
  3. I will work on ways to encourage more students to watch those videos

Dr. Carrie Helms Tippen – English

Project Overview

The main goal of the project is to introduce students to digital humanities, a new and growing subfield of literary and interdisciplinary studies. The technology and the skills are transferable to other fields because the assignment is project based, independently driven, and gives students experience researching, collecting, publishing, and being aware of audience. The project meets my pedagogical and philosophical goals of the public intellectual by making the work of the university freely available to real audiences.

  • At the beginning of the semester, students were assigned a primary text from the syllabus. They were allowed to work independently or in small groups.
  • By the end of the semester, the student(s) added a minimum of 5 items to a collection hosted on Omeka (an online archiving tool) related to their assigned text. At least one item should be an original document demonstrating their own interpretation of the text using digital humanities methods: a video, slide show, map, graphic, database, website, transcription, etc. Other items could be links to other DH projects, PDFs, images, scholarly archives/research, any existing scholarship or archives that interpret or give context to the text.
  • When we read their text in class, the student(s) assigned to it offered a presentation and lead discussion of the historical context surrounding that text. This presentation was meant to be informative, based on academic/scholarly research, and general internet searches (focusing on sources associated with libraries, universities, archives, etc.). This was a step in the process of creating materials for the Omeka archive. The class gave feedback about what is included in the presentation and what further research could be added.

Project overview

https://prezi.com/view/46ZkbkMacxTrvrUe7YLH/

Planning Process

The primary challenge in planning this project was figuring out how to add an introduction to digital humanities and instruction in tech tools to an already full syllabus of reading and discussion. Every primary text I eliminated from the reading schedule also eliminated an option for students to research. I was also aware that in order for students to have the most time to complete their projects, they would need to make a lot of decisions about this project at the very beginning of the semester with very little prior knowledge or experience. I would have to get them from zero to independent in the first four weeks of class. So I planned a series of readings and “Digital Humanities Project of the Day” features to get them maximum exposure.
I also had to plan in a lot of check-points to ensure that students were working steadily and felt continuously supported in this foreign task. I asked them to think of me as an unofficial group member and project consultant. I met with each group independently to discuss their ideas, write a proposal, make recommendations for tools, and provide sample projects.

I used the SAMR model for planning. I did not want this project to be a “substitution,” like putting a paper online or using Omeka to make essentially an annotated bibliography. Instead, I really wanted students to use tech tools to create something they could not summarize in a five-paragraph essay, or to discover something about the text that was not obvious from traditional close reading practices. My goal was “redefinition:” a new way of reading or presenting the text that cannot be accomplished without tech tools.

Implementation

STEPS FOR STUDENTS (working individually or in groups)

  1. Choose a primary text from the syllabus to be the focus of the project. Read ASAP and begin preliminary research right away.
  2. Write a project proposal.
    1. Describe your group’s contribution to the Course Archive (excluding the new item that you will create). What is your primary text? What have you found so far that will be appropriate for our course archive? What kinds of items or objects are out there? Have other scholars already done DH-type projects with your text?
    2. Describe the new item that your group will create for the archive. What do you hope this finished product will be? What technologies will you be using to create the project? What data will you collect from the text? Can that data be overlaid with existing data?
    3. Why is this the project you want to create? What conclusions do you think you can draw from the data you will collect? What does this project add to the scholarly conversation about your text? Clearly articulate the goals and purposes of your project.
    4. Provide a timeline for your project with due dates for specific tasks. Assign roles to group members.
    5. Attach examples of the materials you intend to produce. These could be very rough draft versions, outlines, or storyboards of the materials you will produce OR materials that could serve as a model for yours.
    6. Describe what support you may need from the instructor (ideas and advice, connect with resources, learn technology, etc).
  3. Meet with instructor to discuss proposal.
  4. Keep records of process in a Work Log. Record all activities associated with this project: reading, researching, thinking, planning, outlining, writing, revising, note-taking, drafting, working with tech, learning new tools. Note time spent. Reflect often on progress and learning.
  5. In class presentation and discussion leading when your text is assigned on the syllabus.
  6. FINAL PRODUCT
    1. 5 items in the class archive on Omeka: at least one new item plus links to archives, scholarly articles, images, etc.
    2. Present findings to class in the final exam period.

CONTINGENCIES:

  1. I was afraid that students did not have enough information or familiarity with DH to come up with a new project on their own; the parameters might be too open and paralyzing.
    1. DHPOTD: Digital Humanities Project of the Day. I made links available and talked through the projects with students as a class to show many options.
    2. I created a set of pre-approved projects to choose from that could be applied to most any text (maps, timelines, wordclouds,etc).
    3. I should have had more in-class status updates and project sharing so that students were aware of ideas in other groups.
  2. My meetings with students around their proposals showed that they needed a lot of tech support or direction.
    1. I set up special office hours just for this class.
    2. I brought in a senior student with DH experience as a contact person.
  3. Students proposed projects that were far more ambitious than could be completed in one semester without additional support.
    1. I talked them through priority setting and gave permission to modify or limit the scope of their projects.

Assessment

I informally assessed students’ familiarity with Digital Humanities at the beginning of the course. As expected, students had very little exposure to DH as a scholarly activity, though they had much experience with tech tools and writing in online spaces. After reading an introduction to DH, they rated their understanding at about 2 on a scale of 1-5. After discussing that article and looking at many examples of projects, the class average moved to 4.
At the end of the semester, I administered a survey and collected 17 responses from a class of 23 students.

  1. Define Digital Humanities.
    1. All 17 answers were acceptable definitions. They centered on using digital tools to analyze written texts. Most responses emphasized accessibility: both the texts and the discoveries made from the projects were meant to be accessed in digital spaces by ordinary citizens. They also emphasized creativity in that the researcher was inventing methods of research or applying tools in innovative ways to create new knowledge.
  2. On a scale of 1-5, rank your feeling of anxiety when you first learned of this project. (1 = low anxiety, 5 = high anxiety)
    1. The average was 4. 2.
    2. Only one student responded with a low anxiety.
  3. On a scale of 1-5, rank your feeling of excitement when you first learned of this project. (1 = low excitement, 5 = high excitement)
    1. The average was 3.1.
    2. No students responded with the highest level of excitement, but only 2 responded with the lowest level of excitement.
  4. Now that you have finished the project, on a scale of 1-5, rank your feeling of satisfaction in the product you made (1 = low satisfaction, 5 = high satisfaction)
    1. The average was 3.5
    2. No students responded with the lowest level of satisfaction. Only one responded with the highest level of satisfaction.
  5. Did you work on this project alone or in a small group?
    1. 8 respondents worked alone.
    2. 9 respondents worked in groups.
    3. The average satisfaction for students working alone was the same as for students working in groups.
  6. Estimate how many total hours you think you will individually spend on this project by the time it is complete.
    1. 4 students chose the maximum (more than 25 hours)
    2. 4 students chose 15-25 hours
    3. 8 students chose 5-15 hours
  7. What (if anything) do you think you learned from this project that is applicable to other classes or scholarly work? Could you repeat any factor of this assignment in another class or in your future work?
    1. 4 students did not respond to this question
    2. The other 13 were generally positive and noted research skills as useful in other classes.
    3. “It’s important to force tech to catch up to the humanities. I would like to do something like this in other English classes.”
    4. “I can tell you it’s applicable, but I can’t word how”
    5. “It forced me to thoroughly utilize our library databases to find what I was looking for, and made me familiar with some that I hadn’t previously used, but of which I am now familiar enough with to know when to search through that database according to the content I’m looking for.”
  8. If you were assigned a project like this again, what would you do differently as an individual or group member?
    1. Students may have misunderstood this question as asking if they would change their group formation. 7 responses were about working individually or in a group (ex. “No I would still work in a group” was a typical but inappropriate response.)
    2. Recommendations from the other 10:
      1. Set checkpoints for amount of work
      2. Define search parameters earlier in the project
      3. Choose a different final project, perhaps more complex (“instead of just a map,” “I might try a more ambitious project, or have a partner.”)
      4. Choose the tool first then the text.
      5. Choose a text with more personal interest
  9. If you were the instructor giving this assignment, what might you change, add, or eliminate next year?
    1. More checkpoints during the semester (updates, meetings with instructor, in-class work sessions)
    2. More focus on the project, fewer assignments outside of project
    3. OR make it a short-term project
    4. Show more examples

Reflections and Next Steps

As I suspected, students were brand new to the idea of Digital Humanities, and even at the end of the semester, one student in particular responded, “it’s all too new to me to find a good answer” to the reflection questions. I succeeded in communicating to students the potential for creativity and the many possibilities for DH project, but that openness did not produce the best results for most students. A few really standout projects showed deep engagement with the methods of DH and the goals of the field. For example: Ben’s Excel spreadsheet of uses of the word “evil,” or Isabella and Katy’s Google Map of Samson Occom’s Life. But on the whole, as I suspected, students did not really have enough prior knowledge to be creative or the skills to meet their ambitions.

I think the next time I teach this class, I will keep the DH focus, but I will make the final a shorter-term project. It is an introductory survey class and the first introduction to an entire field of study with a class of mostly non-majors, so the assignment should be more supported and introductory. Instead of asking students to choose their projects in the first week of class, I will work with them through a few practice projects (maps of placenames, timelines of events, wordcloud analysis) as a whole class, demonstrating the decision-making processes and the technology in class, before putting them into groups to execute their own. I met with several students in the last week of classes who had made no progress on their projects since our initial meeting about the proposal in week 3, so even though DH projects are by nature time-consuming, they do not have to take 12 weeks to complete.

Overall, I think the project met my goals for introducing DH in the same way that tossing a person in the deep end of a pool “introduces” them to swimming. The immersive experience led to some really creative projects for a few upper-level students, but most students responded with safe projects and pedestrian ideas. I think the project can be revised so that the creative students can still maximize their creativity while providing enough support that more students can feel comfortable improvising and reach for creativity.


Dr. Lou Martin – History


Project Overview

My goal has been to design the first digital humanities course for the History program, and I am teaching that course this semester.  The course is titled HIS 309 Digital Local History, and in it, students learn about an aspect of local history, study some of the primary opportunities and challenges of using digital media to analyze and interpret histories, and then use available primary and secondary sources to create an online local history exhibit.

Digital Humanities has recently become an important subfield in multiple disciplines, including history.  It encompasses using digital technologies in research as well as presentation of findings.  In the field of history, scholars are increasingly relying on digitized texts and images in their research.  More and more archivists are using optical character recognition software to translate typewritten documents of the past into searchable text for current researchers.  And finally, historians and curators are creating online exhibits with the goal of stretching beyond the written word or the museum wall to online media that not only make their work more accessible to a broader audience but also incorporate new ways to visualize information and allow more user interaction.

All of this means that it is important for Chatham history students to learn about these developments, learn some of the techniques of digital humanities, and to use new skills on projects of their own.  Furthermore, this is another opportunity for students to make the transition from being consumers of information to historians in their own right.  Finally, this course incorporates project based learning that is typical in many museums, archives, and historical societies doing the work of digital humanities.


Planning Process

In the summer and fall of 2016 as part of the Tech Fellows program, I researched digital technologies that students might use to create an online exhibit.  Lauren Panton recommended Timeline JS by Knight Lab of Northwestern University as the umbrella tool for bringing various elements of the project together.  Timeline can display photographs, images, infographics, and maps as well as play audio clips.  Becky Borrello recommended a variety of platforms for the website including WordPress, Weebly.com, and Wix.com as well as a storyboarding technique for web design.

I chose an online textbook by Daniel Cohen and Roy Rozenzweig titled Digital History: A Guide to Gathering, Preserving, and Presenting the Past on the Web for the students to read to learn about the challenges and opportunities of digital history as well as some of the basics of planning on online exhibit and questions historians must ask themselves  http://chnm.gmu.edu/digitalhistory/

I also am having students read articles on local African American history as well as selections from David Kyvig’s Nearby History: Exploring the Past Around You.  These additional readings should help to ground students in the secondary literature and give them ideas for finding primary sources.

Finally, I modeled the course schedule on a similar class being taught by one of my colleagues at Shawnee State University.  Dr. Andrew Feight has been teaching a digital history course where students add to a growing digital archive of local records and photographs as well as a smartphone app that helps people explore local history.  Feight uses project-based learning to encourage students to identify goals and learn the skills needed to meet the goal.  The students also identify roles for themselves within the group and recognize the need for different people to have different and complementary strengths.


Implementation

The course started in January 2016 and the students spent the early weeks reading local history, learning about potential primary sources in nearby archives (including our own), and discussing their own project.  This project will focus on the history of Westinghouse High School and will incorporate the school’s “Wall of Fame”—itself an effort to preserve the school’s history—as well as oral history interviews that past Chatham students have collected.

The students only recently began the process of designing the website and gathering materials.  They identified roles for themselves.  To start, they all decided to explore individual topics:  music, sports, women, civil rights, WHS in Homewood history, and education.

At the beginning of the process, I asked students to identify values for the group from then on.  They identified values such as respect for participants, respect for the past, positive stories, and commitment to the project.

I also asked the students to imagine a process to hold one another accountable and to be the basis of grades.  One student recommended progress reports, and I suggested they be biweekly.  Another student suggested the final project be graded on three C’s:  creativity, content, and citations.

During the project gathering phase, the only grade they receive is on their biweekly reports, but they get feedback from the group on their contributions and informal presentations.

Sam Houston State University’s Center for Project Based Learning recently identified common elements of all project based learning:

  • There must be the presence of a driving question or central concept.
  • Students must learn through investigation of defined goals and should be constructive and knowledge building.
  • Projects are student-centered with teacher facilitation or guidance.
  • Projects are real-world and have significance to the student.
  • There is a task, a process, a product and a reflection.

Digital Local History uses all six of these elements.


Assessment

In Digital Local History, there are three assessments of the project based learning.

The first is the feedback and grades I give on the biweekly progress reports.  So far, I have based these grades on the level of effort and introspection on the reports.  Students who have spent times crafting the reports, detailing significant efforts, and contemplating their results in the context of the larger project have received A’s.  Students whose reports show evidence of sloppiness and superficial thought and a lack of significant efforts to gather materials have, so far, received C’s and encouragement to rediscover their passion for their topic and to fall back on skills they have read about in class.

The second feedback will be from community partners.  This is a common practice in PBL, and we are scheduled to present a nearly finished product to community partners near the end of the semester.  This will be an opportunity for them to comment on the project’s accuracy, creativity, and its spirit—does it capture the history of Westinghouse High School as the community understands it?

Finally, I will give the project an overall grade based on criteria suggested by a student and agreed to by the others:  creativity, content, and citations.

Successes and Challenges

One of the successes has been getting the students out of the classroom and into the local archives and brining community partners to the classroom.  This has made the project all the more real for the students.  Students have seemed to value their interactions with people who experienced the history they are discovering.  And getting in the van to take a short trip has injected some feeling of going into “the real world” to explore history.

One of the challenges has been that this particular group of students is not particularly talkative, especially not the students who are most prepared for class.  This has led to stilted conversations instead of exciting brainstorming sessions.

Furthermore, one of the essential elements of PBL is to have students develop their own goals and then learn skills along the way to achieving those goals.  It has been hard to get student to visualize a “desired outcome” that encourages them to learn new skills.  Instead, students want me as the instructor to tell them what to do, and they want me to show them templates for them to fill in.  This undermines one of the elements of PBL, but given that the students are unaccustomed to PBL and are afraid to fail, this is one of the concessions I am making.


Reflections and Next Steps

Ultimately one of the biggest challenges for me is relying on the students to deliver a finished product for community partners to see and evaluate.  Like most instructors, when I am in control of the content of the course and structure the class to ensure certain outcomes, I am in my comfort zone.  This course has forced me to leave the comfort zone and entrust the students with more control and has forced me to have faith that they will deliver.

Over the next month, the students will bring together their text, images, and audio, assemble them into timelines and webpages, present them to community members, and make some revisions based on community feedback.


Deanna Hamilton video

Deanna Hamilton, Ph.D. Counseling Psychology


Project Overview

My technology fellows project was not terribly creative.  I have been resistant to the idea of creating online classes, but I know that there are online instructors who do an incredible job teaching in that format, and I also know that students will benefit if I learn some best practices of online teaching.  So, during Fall and Spring semesters (2015-2016) I turned three class meetings for the Human Development across the Lifespan course into online classes.  I used various technological components for each of the three classes and I surveyed students about different aspects of the online classes.


Planning Process

In planning my project I considered how to reach the course learning objectives via online activities.  All of the activities for the 3 online class meetings were asynchronous through the Moodle shell created for the class.  The course, Human Development across the Lifespan, (graduate level psychology) has one overarching objective “Upon completion of the course, students will be able to describe major concepts and empirical findings related to human development.”  This objective is operationalized across four learning outcomes:

  1. Theories of individual and family development and transitions across the life-span
  2. Theories of learning and personality development
  3. Human behavior, including an understanding of developmental crisis, disability, exceptional behavior, psychopathology, and situational and environmental factors that affect both normal and abnormal behavior
  4. Strategies for facilitating optimum development over the life-span

I used technology to substitute an online learning environment for 3 different on the ground class meetings.  I modified the assignments and activities that I do in person to fit the online format.

For each of the three classes I used increasingly more technological tools.  For each online class there was at least one activity that addressed each of the four learning outcomes.  For example, in the third online class students watched and critiqued videos/articles describing the transition to emerging adulthood.


Implementation

The structure of the graduate level human development class (meets one time per week for 3 hours) is that each week a different age group is the focus from a physical, cognitive, and psychosocial perspective.  I first identified three weeks of content that I believed could most easily be translated to an online format.  The first online class occurred three weeks into the semester.  The topic was cognitive and emotional development in early childhood.  The second online class occurred at week 5 and the topic was cognitive development in middle childhood.  The third online class occurred near the end of the semester, week 13, and the topic was cognitive and psychosocial development in emerging and middle adulthood.  Please see below for the specific description of the class activities.  Though all of the technology I attempted to use did work (miracle!), my plan B was to do the most basic online course by simply posting activities to Moodle (like in my first online class).

First Online Class:
PowerPoint slides posted to Moodle, a Microsoft Word document explaining the activities for the day (below).
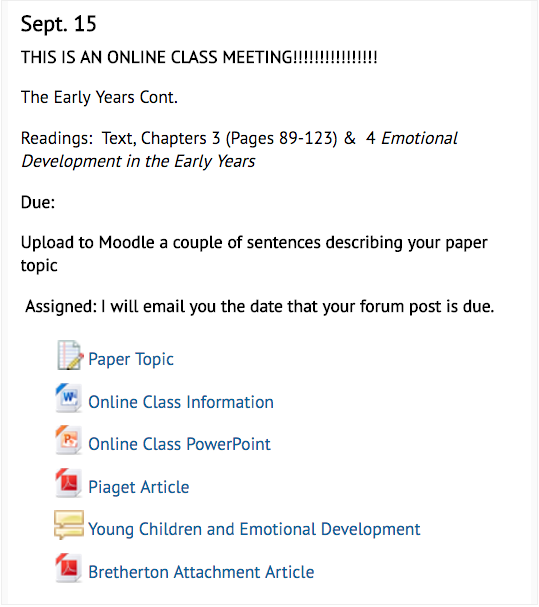
Figure 1: Human Development Fall 2015 Moodle Week 3

Online class information sheet (posted to Moodle to guide students through the online activities)

1).  After you have read the textbook chapter(s) (primarily chapter 3, a little bit on 4) go through the PowerPoint presentation. Are the concepts making sense?  Are you able to connect the ideas in the PowerPoint with the info in the text?  Think about how it relates to the counseling work you will do in the future.  You’ll do a closer reading of the slides after this overview (about 40 minutes)

2).  Return to slide #2 (it says typical development at the top).  There is a link to a TEDtalk that summarizes some of what we know about prenatal learning. The name of the talk is “what we learn before we are born.”  First, watch the talk.  Then, write down one or two of the findings that you found most interesting.  You can hand write this on a piece of paper or you can type it on a Microsoft word document – either way you will need to show me the document (on your computer screen or the paper where you wrote your responses) next week in class. (video 17 minutes, response 10 minutes = 27 minutes total).

3).  Slide #3 summarizes some of the postnatal milestones of “normally” developing motor, visual, and auditory skills (highlights from the table on page 83 of your text).  Take a look at the slide or the table on page 83, write down one or two of the processes that surprised you in terms of when then developed or what other processes were developing simultaneously, or anything that you found interesting about the development of milestones across the first 5 years. (about 8 minutes)

4).  Slides #4 & 5 provide an overview of Piaget’s theory.  Do they make sense?  Now take a look at the Biographical sketch on page 80 of the book and/or the PDF from an article of his that is on the moodle page.  What comments or observations do you have about Piaget, his writing, his background, or his theory?  This should be a couple of sentences. (about 15 minutes).

5).  Slide #6 describes the substages of Piaget’s sensorimotor stage.  Note:  you will not have to memorize the substages, I just wanted you to see that they exist.  Can you summarize what generally occurs over the Sensorimotor stage?  What would be the newspaper “headline for this stage?  (about 5 minutes).

6).  Slide #7 describes the concept of object permanence (also refer to pages 84-85 in the text).  What’s the big deal about “object concept”?  Why is having an object concept so important to cognitive development? (5 minutes)

7).  Slides #8 & 9 describe other ways of measuring infant cognition (other an Piagetian methods).  The depiction of Baillargeon’s research is different than page 85 of your book (just a different version of the same type of research).  What do you make of the difference in development of object permanence as found by Piaget (in the first year) as compared to more recent research by Baillargeon and colleagues (as young as 2.5 MONTHS!)?  (10 minutes)

8).  Take a look at the YouTube video showing examples of Piagetian conservation tasks.  You will see children in the preoperational stage who fail the tasks (give the wrong answer) as well as older children (in the concrete operational stage) who pass the tasks.  Based on the information on the slides (12 & 13) and the text (pages 92-95, section on Preschoolers’ cognition – though our text focuses on numbers, Piaget looked at conservation through different types of tasks) what make preschoolers thinking illogical?  How come they fail the conservation tasks?  (video 3 minutes, response 7 minutes = 10 minutes total)

(if you Google “Piaget conservation task, YouTube” it is the first thing that comes up).

9).  Piaget described preoperational egocentrism as measured by the three-mountain task.  Take a look at an example in this YouTube video — keep this in mind as we continue to discuss perspective taking ability. (5 minutes)

10).  Slides #15 & 16 describe some information related to the concept Theory of Mind (pages 95-99 in the text, section in Chapter 3 “Understanding the Mind.”  Is this a concept with which you are familiar?  Why is it important to our cognitive and psychosocial development?  Review the information and get a feel for the concept and how it is measured.  This is something we will discuss further in class.  (10 minutes)

11).  Slides #17-19 provide a very brief overview of some language development milestones.  Entire courses are taught on the topic of language development.  At this point, familiarize yourself with the general progression of language development.  Then, consider the finding described on page 104 of the text related to the difference in vocabularies according to how much parents talk to their children:  “In a 100-hour week, a toddler in a professional family might here 215,000 words on the average, in a lower-middle-class family children here about 125,000 words, and in the poorest homes about 62,000 words.  All of the children learned to talk on schedule, but the differences in parental input were correlated with the children’s vocabulary measures by age 3.” (Broderick & Blewitt, 2015).

What does this research suggest about the importance of caregiver-child conversation?  You do not have to write anything down, just think about it.  (5 minutes)

12).  Slide #21 describes some important terms developed by Vygotsky.  Use the slides and the text (starting on page 105, section called “Vygotsky’s sociocultural theory”) to make sure you are familiar with the important contributions made by Vygotsky in understanding how young children learn.  (5 minutes)

13).  Slides #24-27 provide an introduction to some of the important points from Chapter 4 (Emotional Development in the Early Years).  Review the concepts on the slides (5 minutes).

Then, using your favorite search engine, find something that has been posted related to the emotional development of children.  The idea is to pretend that you are a parent who is looking online and reads something about young children and their emotional development.  For example, when I just did a google news search for “young children emotional development” the first thing that came up is an article with the title “Is your child a psychopath?”

Next, quickly skim whatever article/video/tv clip that you find.  This SHOULD NOT be a scholarly or peer reviewed piece.  How do you understand the article / news item that you found in relation to the information that you have read on emotional development?  Please post the title of what you found and your reaction to it on the forum post that is on the Moodle page for today.  The post should be no more than a sentence or two.  (15 minutes)

14).  On the Moodle site for tonight there is a PDF for an article called The Origins of Attachment Theory:John Bowlby and Mary Ainsworth we will use the article as part of our discussion next week.  Please spend 15 minutes going over some of the article.  At this point you do not have to do a super close reading of the article, it just provides a great overview of the attachment literature and is a really good reference to have – we will talk about it next week!!!!!!!!!!!

Second Online Class:
Narrated PowerPoint slides posted to Moodle, a Microsoft Word document explaining the activities for the day, and introduction video (recorded on my iPad and uploaded to Moodle) of me welcoming them to class and giving them the plan for the day.
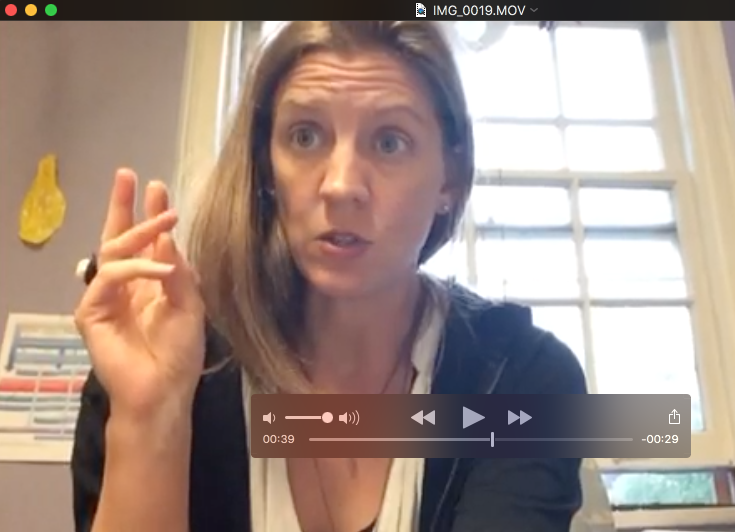
Deanna Hamilton video

Figure 2: Intro Video

Online class information sheet

Part I.  The Bridge (20 minutes total)

  • Please look back at the last online class activities that you completed (Sept 15th). Please identify one area / concept / idea that needs further clarification.  Please post your question to the Moodle Forum.  I will try to make sure I’ve prepped answers to all (or most) of your questions by the time we meet next week.

Part II.  Paper Portion

  • Go through the plagiarism PowerPoint that is posted on Moodle. Some of it may be review, but it is really important to keep in mind as you start to work on your papers. Let me know if it makes sense or if you have any questions – you do not have to upload anything or write anything down. (30 minutes)
  • Check out the example papers that are posted on Moodle (located in the section for this week). What are some initial ideas you have about how you will organize your paper?  What are some of the sections that will be involved that you’ll want to make sure to cover?  You do not have to upload this anywhere, just be prepared to talk about it / show me that you gave it some thought.  (30 minutes)

Part III.  The PowerPoint for Chapter 6

  • Go through the Middle Childhood PowerPoint (45 – one hour…but probably less. A couple of the slides are narrated)
  • Go to slide #11 – Selman’s Stages of Friendship. (15 minutes).  These stages are described on pages 231-234.  You do not have to write anything down, just see if you can imagine what “friendship” looks like at the different stages.
  • Glossary activity (30 minutes, probably less). There is a tab in the Moodle section for this week that says “glossary.”  Go through Chapter 6 and choose any of the concepts or ideas that are described in the chapter.  Use the paraphrasing skills you practiced in Part II of this assignment to make a glossary entry for that concept or idea.  Basically, describe one of the concepts or terms from the chapter in your own words using the glossary tab that is set up for you in Moodle.

Third Online Class:
A video of me teaching class that was recorded using the SWIVL video capture system. Throughout the “lecture” I directed students to online activities that they completed via Moodle, I also created an online class information sheet (below).

Part I (maximum amount of time to spend on this section is 1 hour, it is ok to spend less)

The slides begin with a review of the ideas related to emerging adulthood, which is where we ended class last week.  Please go over and/or listen to that slide (#3).  Reflect on what you think about emerging adulthood?  Do you believe it is a new stage that is independent from adolescence and young adulthood?

Next watch the following videos (if you can’t watch the videos, that’s ok, I just think they are brief and super helpful in seeing the two people who often write / research about emerging adulthood.  After the videos, read the Generation Me and Generation We article.

Jeffrey Jensen Arnett: Emerging Adulthood Video

Twenge: Generation Me Video

Next, do a brief forum post (a couple of sentence) on a). which perspective / article you find more persuasive? B). what it is that you find compelling? and c). how this information (related to emerging adulthood OR generation me) may be helpful to counselors?

Part II (maximum amount of time to spend on this section is 30 minutes, it is ok to spend less)

Take a look at / listen to the video for slides 4-12.  Contemplate the information.

Part III  (maximum amount of time to spend on this section is 1 hour, it is ok to spend less)

Look at / listen to the slides on the Five Factor Model of Personality (#13 & #14, pages 483-485 in your text).  Next take the following “big five” assessment (there are loads of these measures available on the internet. This one is free and comes from a reputable group of researchers.

Upload a couple of sentences about what you thought was interesting, useful, problematic about this way (the five factor model or the actual measure you took) of understanding personality and how it may or may not be useful for counselors.

Part IV  (maximum amount of time to spend on this section is 30 minutes, it is ok to spend less)

Look at / listen to the information on slides 15-21.  What comes to mind when you think of the term “midlife crisis?”  Then watch the following video, or if you are having trouble getting the video to work you can read the article The Real Roots of Midlife Crisis (from The Atlantic):

What do you think about the idea of a “midlife crisis?”  Is it a “real” or useful construct?  Is it more helpful to think about the notion of turning points?  How so?  Write two sentences-ish of a forum post.


Assessment

I assessed my project by asking students to complete an anonymous survey after the online classes (see below).  While I have not done a formal analysis of the responses, a frequency count indicates that, in both sections, no students (0/40) reported “learning more” in the online format.  In the Fall semester, 90% of students reported “learning less” in the online classes.  In the Spring section, students were evenly split between those who reported learning less (49%) or about the same (51%) in the online format.  The most common reason students felt they learned less had to do with preferring the in class meetings and discussions (finding the in person setting more valuable).  Students indicated that they enjoyed the time flexibility of the online class (could complete it in chunks or whenever they had free time) as well as posting/responding to forums.

Online Classes Feedback Form

  1. As compared to “in person” class meetings I felt like the online classes led to:

Please Circle One

The same amount of learning
More learning
Less learning

  1. If you indicated more or less learning in your answer above, could you explain some of the reasons why?
  1. One thing that felt really useful about the online classes was (your favorite activity)…you can list more than one thing 🙂
  1. One thing that you really didn’t like about the online classes (or would like to change; your least favorite activity)…you can list more than one thing J
  1. Ideas and / or suggestions for future online class meetings?

THANK YOU!!!!!!!!!!!!!!!


Reflections and Next Steps

All of the technological components of the classes worked well (Swivl, uploading video, various Moodle activities), and I certainly felt like I had support to make the project happen.  The thing that didn’t work so well was my attitude and the attitudes of the students.  That is, the first semester I tried the online classes I was not very confident that it would “work” in terms of helping students to meet the class objectives, and my lack of confidence translated to (or at least contributed to) students’ dislike of the online meetings.  The second semester, I felt more confident about the online classes and students seemed to be more accepting of the format.

There is not much I would change.  I did the three different formats in order to “experiment” with what worked best with the course content (which was informative), and I think the variety helped keep students interested.  I may narrate more of the PowerPoint slides and have more “interactive” activities such as forums to increase synthesis of the content and facilitate student engagement with the material.

I have two goals for year two.  First, I am going to put one or two other age groups in the online format – it was really great to have the online versions ready to go when two of the weeks were snowy and icy during the Spring semester.  Second, I am going to work with Jen Morse to figure out the best way to use a writing app (Noodle Tools) to help students construct the research papers they write for the course.

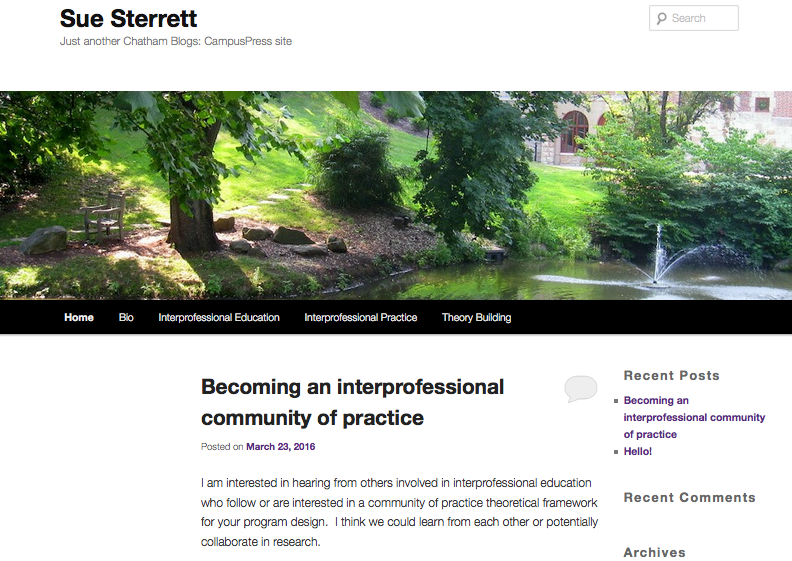
Sue Sterrett Blog

Sue Sterrett, Ed.D. Nursing


Project Overview

My goals for year 1 of the Fellowship were:

  • Explore ways to create a community of researchers around my research interests
  • Improve my liaison courses by integrating new technologies

I have three projects.  The first is to create a blog that will present my research interests and encourage those with similar ideas to join in a conversation, creating community around common research interests.  My teaching goals are to create two assignments in 703 that integrate VoiceThread and encourage students to use technology.

Assignment 1 replaces a current assignment to create a Fact Sheet by opening up the possibilities of reporting the information, in the assignment (See attached.)  Assignment 2 replaces a discussion forum with VoiceThread.

In the next year I would like to create an orientation to the course using Panopto.


Planning Process

  1. Blog– I met with Lauren Panton, who helped my set up the blog. I plan on reviewing other blogs and beginning to post.  Learning will include how to reach the community I am interested in engaging in the discussion.
  2. 703 Assignment 1 will augment an assignment that was to create a Fact Sheet, opening it up to other outputs beyond paper. Planning for this assignment change will include determining what suggestions to make for types of outputs for the assignment.  I looked at the model assignment on the Faculty Technology Fellows site- Anthony Isacco’s PSY627 course.  Potential outputs for a “Fact Sheet “ could include a YouTube video, Tumblr Blog, Instagram site, or Facebook page.  One question is whether to allow a written option or not.
  3. 703 Assignment 2 will use new technology to modify a Discussion Forum with VoiceThread. Planning for this assignment will be my gaining comfort with the technology, then creating a way for the students to gain knowledge prior to the discussion.

Implementation

Blog- Lauren Panton met with me initially and the blog site was created using WordPress. I looked at other scholarly blogs including one by Mary Beth Mannarino. For my blog site, I read information regarding writing a blog bio and began a first draft.  I have not written any blog posts or determined how to find the audience for the blog.  This will require effort on my part in the next year.

Sue Sterrett Blog

703 Assignment 1: I am developing the assignment sheet for this assignment and plan to institute it during the summer semester.

703 Assignment 2: One discussion forum will be replaced with a VoiceThread Discussion.  I will need to look at the forums and decide where to place the VoiceThread discussion.  Determining how to allow students to develop knowledge to use the technology is still under consideration.


Assessment

None of the projects are to the point of assessment.  I think success of the blog would be assessed by the number of people who come to the site and the number who interact on the site.  The two 703 assignments can be assessed using the end of class assessment as well as reaching out to the students asking for informal thoughts as the assignment is first implemented.


Reflections and Next Steps

The first year was a broad based review of potential technologies and how I might use this knowledge to impact teaching and research interests.  I hope to be more targeted next year in implementing and assessing these projects.


Bill Biss

William Biss, M.Arch. Interior Architecture

Overview

In the Interior Architecture Graduate Building Systems course, students learn about the different building systems that essentially make a building “work”. The mode of instruction is traditionally a combination of lecture, quizzes, exams, projects, and most importantly construction site visits. A construction site visit allows a student to experience in-progress construction giving access to many of the systems discussed in the course such as structural systems, mechanical systems, electrical and plumbing systems. One of the challenges faced with the fall semester, 7 week, graduate level building systems course is the evening time frame, which, although best accommodates graduate student schedules, becomes problematic when attempting to coordinate site visits during working daylight hours.

Implementation

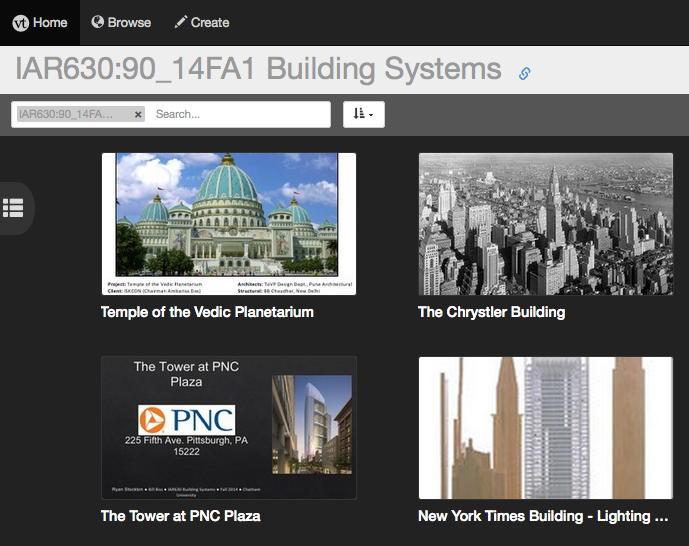
The implementation of VoiceThread was an attempt to solve the site visit challenge mentioned above. VoiceThread is a cloud-based discussion thread with a focus on creating a true presence among its participants beyond traditional text-based interaction. VoiceThread allows users to upload and share documents, presentations, images, audio files and video and supports varying modes of discussion and commentary through audio, webcam/video, text and phone.

The 7 week course was reconfigured to contain one lecture based class and one “floating” site visit per week. Although encouraged, students were not required to attend each weekly site visit, however, each student had to attend at least one and author a corresponding VoiceThread presentation. This offered flexibility and allowed the students to plan ahead in determining which site visit best suited their schedule outside of the evening class time. In addition, to make up for lost contact hours resulting from not being able to attend a weekly site visit, each student was required to comment and participate in all site visit VoiceThread’s developed by their peers. So to summarize, a student would attend and develop a site visit VoiceThread based on images and video taken at the site and would also participate in VoiceThread discussions authored by their peers.

VoiceThread

Success/Challenges

Overall, VoiceThread offered flexibility to learning outside of the classroom as anticipated. The VT dialogue among the students continued and evolved over the duration of the course in a fairly natural and organic manner and peer-to-peer teaching/learning was evident from the VT authorship requirement for each student. In addition, the application gave a more interactive dimension to an otherwise lecture-based type of course. As with implementing any new technology or software there was a slight learning curve to overcome for both the students, and myself however, it was fairly short lived and we were all able to utilize VoiceThread through its desktop and mobile applications. Perhaps not a challenge but a drawback of the software is the way it organized all comments and added the actual discussion thread to the end of the original presentation. Although this method of organizing the thread is sequentially accurate as to when the comments were made, it made reviewing the entire discussion unnatural and slightly disjointed. The newer version of VoiceThread has reorganized the overall thread to where it now adds the comments to the end of the relevant slide instead of at the end of the entire presentation.

Assessment

Initially, students were reluctant to participate in the discussion thread using the video and/or audio method of commenting and, overall, they felt more comfortable using the text-based method only. We started using the software through an introductory exercise called the “Everyday Task” VoiceThread. Students were asked to author a short VT presentation explaining an everyday task to help overcome video/audio anxiety and gain familiarity with the software. After watching the “Everyday Task” VT the following week, students quickly overcame any reservations and seemed to relax and enjoy the thread. The course continued with a total of 5 construction site visits over 5 weeks and ended with a final documentary VT of an architecturally significant building focusing on its integrated building systems. The final VT documentary was a means in testing and evaluating student competency in both the VT application as a teaching/learning tool and the building systems course content. At the end of the course the 5 students developed 16 VoiceThread’s containing a total of 115 video-based comments.

Next Steps

I’m planning on implementing VoiceThread again in future Building Systems courses with a more systematic method in place to collect feedback, user data and to better measure and evaluate its effectiveness in this type of application. I will also be experimenting with alternative uses in other courses beyond a presentation and discussion tool.


Submittable

Sheila Squillante, MFA Creative Writing

Overview

During last summer’s Technology Fellows workshops, my primary goals were to learn technologies that could help instruct and connect our low-res MFA students to the program and one another. I imagined focusing on Panopto to record videos of campus readings and talks to share with them. A second, and more urgent, objective emerged, however, when a low-residence student (located in Florida) enrolled at the last minute in one of my on-the-ground classes: The Fourth River practicum. Because we are taking steps to more fully merge the full and low-res programs, we have opened all on-the-ground courses to low-res students should they choose to enroll. So far, we have not had a lot of experience with this, so I was heading into a truly experimental space. I had to quickly put together a course that would work for both populations, and in doing so, tried out several technologies, including Panopto, Skype, FaceTime, Moodle discussion forums, and Submittable.

Planning Process

I knew from discussions during summer workshop that there are real obstacles to creating a truly synchronous learning environment for distance and residence students, both in terms of technology and pedagogy. Skype calls drop. Internet connections fail. And even if they didn’t, requiring a distance student to sit, captive, in front of a screen for three hours at a time would not make for a healthy intellectual experience. I determined that the synchronous component of the course for my student would have to be much shorter if she were to feel engaged and invigorated. I settled on requiring her to be “present” for half of the class time—one and a half hours—and began to construct EIAs that would comprise the rest of her seat time. This also helped mitigate some of the technology problems I anticipated, in particular being able to connect with a remote location reliably every week for that length of time.

Implementation

I planned to have my student use some kind of video-conferencing with her genre group for discussions each week, because I felt these were the two students who would be working most closely with her, and thus would offer the greatest possibility for engagement and connectivity. For the second half of each class, they would meet via video conference to talk about the essays from that week’s submission queue. I allowed them to choose which they preferred and they ended up going back and forth between Skype and FaceTime on the iPhone.

For the rest of her seat time, I did a variety of things, including:

Video:

  • Welcome and regular check-in videos with Panopto, that oriented her to the week’s goals and expectations
  • Guest editor conversations that took place over the course of the term

 Sheila Video


Moodle Discussion Forums

  • Individual, where she would respond to my orientation videos with questions or comments about the week’s expectations;
  • Whole-class, where everyone would introduce themselves or respond to various assigned articles about publishing
  • Whole-class, where they would upload blog posts, and then comment on their peers’ work

Moodle discussion forum

Submittable

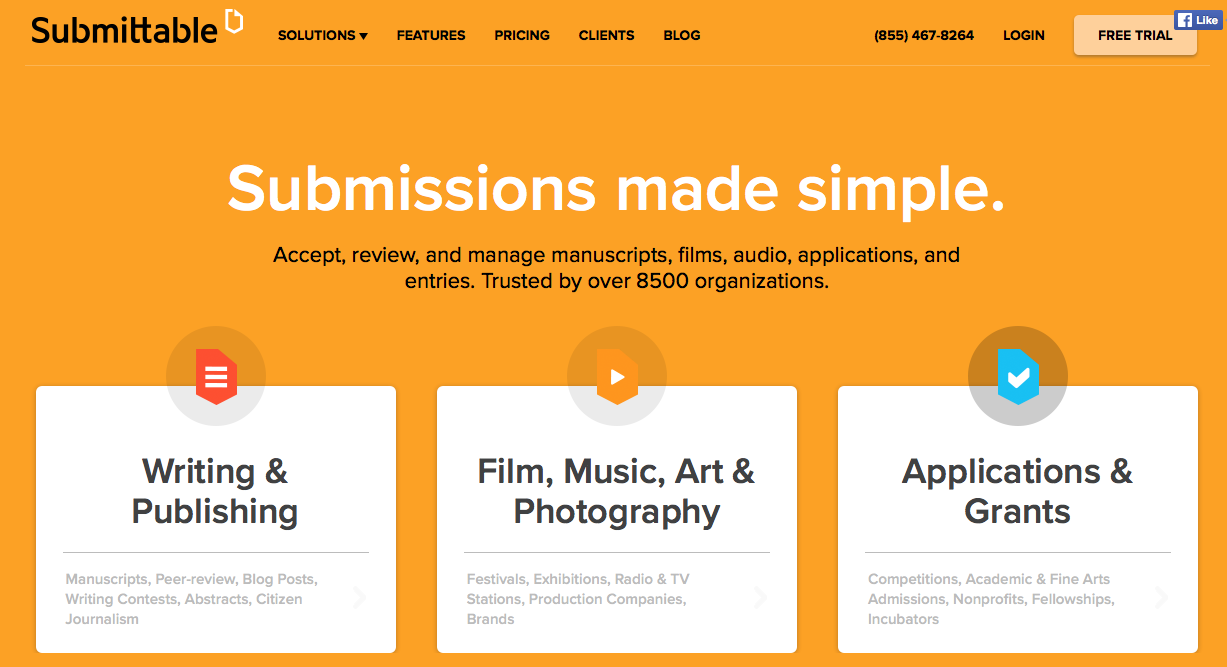
This is the online platform The Fourth River uses to accept submissions. It includes text boxes that allow student editors to have substantive discussions about the merits of a piece of work. Students anywhere can log into this system with a free account, and it is quite easy to use.

Submittable


Assessment

The students ended up finding that FaceTime worked best for video conferencing, in part because they all had Apple phones, and in part because the low-res student’s internet connection was often unreliable. The low-res student commented that she liked the Panopto videos both because they helped her feel connected to me—to see my face and  hear my voice, as opposed to being just an email filled with instructions each week–and because they helped her feel like she was experiencing some of the same in-class learning as her peers. All of the students commented that while the Moodle forums were functional, they felt a little removed from the class experience, and that they didn’t work as well for critiquing work as they did for general responses to articles. From my perspective, they worked well—especially for quieter students– for inspiring thoughtful, thorough conversations. Everyone agreed that Submittable was reliable and streamlined.

Value/Next Steps

I think for a last-minute effort, the course adaptations worked well enough. In the future, however, I think it might make more sense to have the low-res students synchronously “present” for the more pedagogical part of the class, and asynchronous, using the Submittable comment fields, for genre group discussions. Last fall I was most concerned that my low-res student have a robust educational experience and that she feel included in the community to the fullest extent possible. But my overall goal is to make this sort of hybrid class work for all students, full or low-res. Two other options I’m considering are making the class hybrid for everyone, including full-res, and creating a fully online version of the class that will run every other semester.


MSN Facebook

Kathleen Spadaro, Ph.D. Nursing

Overview

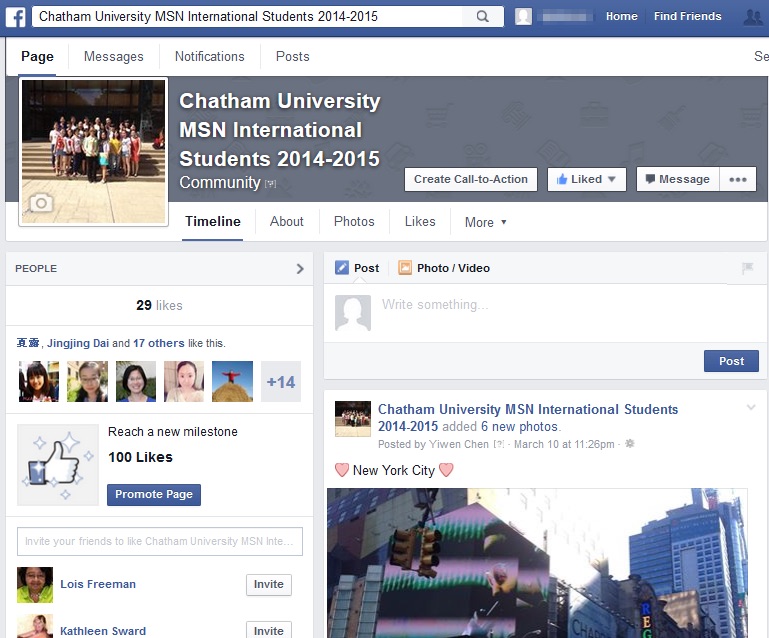
Although the nursing program has been delivering their undergraduate and graduate programs online, I (Nursing) feel the need to continually learn how to challenge the online learner to capture and keep their attention on the content.   I worked with Prezi as a tool to introduce new MSN students to an introductory course that provides the foundation for their learning.  I have been using Panopto in a introductory DNP course, Structure of Knowledge, to define and explain knowledge concepts for a foundational basis of their learning.  With a pilot International MSN track of students from China, I developed a Facebook page for them to post pictures of their cultural experiences and travels throughout the US.

ks

Planning Process

I wanted to provide a different introduction to the introductory course in the newly developed fully online MSN program.  I discussed this with Lauren Panton and decided to explore the use of Prezi because I liked combining symbols with content, movement or connection between concepts, and adding voice explanation.  I spent several technology sessions playing with the software to become more familiar with it.  I then decided what content I wanted to share with the students as an overview of the course.

Implementation

The implementation of the project took some time.  I would recommend having the content be pre-determined and organized to develop a flow from concept to concept.  If you forget a concept, you need to go back, add the new content, and recreate the flow.  I started with picking a design for the Prezi and how I would lay out the content.  I wanted to have content that I could “drill down” from, to add more detail as well as the larger picture for the students to understand both the broad and the underlying  concepts.  I also wanted the final part to end at the beginning.

Adding the content was not too difficult except I would come up with more to add as I went along.  That was a creative process in play which I enjoyed.  The final part was adding the voice description to each of the components.  At first I thought that I just recorded the audio as the Prezi moved through the different components.  However, I found that was not the case.  That part took a while because each of the descriptions was recorded, saved, and then attached to the concept being discussed.

Successes and Challenges

The success was developing a visual overview of the course for the students to introduce them to evidence-based practice.  There were several challenges.  The first was the time it took to record comments and attach them to the components.  However, once I got the hang of it, it became a much easier and faster process.  The second challenge was embedding it into Moodle.  I needed help from Lauren Panton to get it to work for the students.

Assessment

Although there was not a specific assessment of this component to the course, the overall feedback from students was very positive that they had a much stronger knowledge base on evidence-based practice and the role that research plays in the development of evidence-based practice change projects.

Perceived/Determined Value and Next Steps

I do believe that as professors, we need to combine educational strategies to address the different types of learners.  In an online program needs to be diverse in its delivery, thus the need to supplement readings and discussions with visual tools to re-enforce learning.  Next steps will include using VoiceThread for discussion forums, adding brief quizzes using Whiz Quiz to these introductory courses to increase students’ ability to master APA formatting and writing and adding virtual poster sessions using Glogster.  I want to add more technology tools to the DNP introductory course to engage the new DNP students early in their educational process.


VoiceThread

Kristin Harty, Ph.D. Education

Overview

I wanted students to work together to create and present material in an online class.

Planning Process

In the field of special education, collaboration is essential therefore pre-service teachers need to learn how to collaborate with other individuals.  In my introductory special education class, EDU 234 Inclusion: Issues and Strategies, I had always had the students present information about various disabilities and it was always a collaborative project. This year was the first year I attempted to place the class online and my goal was still the same for the online class. So now I had to think about using a tool that was simple and would enable them to work together without needing to ever meet face-to-face.  I chose VoiceThread because it was easy to use and would allow the students to coordinate online without ever having to meet face-to-face to record the presentation. I did consider Panopto and PowerPoint, but I wanted to expose students to a different tool.

Implementation

Most people think of using VoiceThread to aid in online discussion, so I first used the VoiceThread tool early in the semester for online discussion of single questions. This allowed the students to become familiar with the tool prior to using it for their project. I then developed a rubric for the presentation and also modeled how to place and record a PowerPoint presentation on VoiceThread.

I had the students use the tool as a final project so that 1) they had time to familiarize themselves with VoiceThread and 2) they had enough time to plan with their partner.

Screen Shot 2014-04-17 at 2.16.12 PM
Successes/Challenges

This project was very successful. All students in the class were able to create a PowerPoint presentation via VoiceThread. For most students the project was easy to implement. One challenge was that I had to constantly remind students to make the presentation public so we could view them. Another challenge was that in one pairing I could only hear one student’s voice. It took several days emailing back and forth to correct that error. Also, I would like to find an easier way to make the students responsible for communicating to the class that their presentation is available and can be viewed.

Assessment

An informal survey was given to the 20 students at the end of the semester. Students were asked to answer the following questions.

  1. On a scale of 1-5 (1 being uncomfortable to 5 being extremely comfortable), how would you rank your comfort level with technology?
  2. How comfortable are you with VoiceThread?
  3. Have you used VoiceThread before?
  4. Have you created an oral presentation online prior to this class?
  5. What technology tool did you use?
  6. Now think about one tool compared to voice thread. On a scale of 1-5 (1 being easier to 5 meaning more difficult), was VoiceThread easier or more difficult?
  7. Would you recommend using VoiceThread again?
  8. Any other information you would like to share?

The majority of the students had used VoiceThread in a previous class (all but three) and those three students were from a different institution. No student had used the Voicethread tool for a presentation. Fourteen students stated that they had created an oral presentation online prior to class using Panopto  (10) or PowerPoint (4) using narration audio.  One student stated that PowerPoint was easier, 3 people said that VoiceThread was easier than PowerPoint. The ten students who had used Panopto  all said that VoiceThread was easier than Panopto .

Perceived/Determined Value and Next Steps

I was very happy that I was able to maintain an important project in my course despite the course being online. Most students found VoiceThread easy to use and their projects were good. After implementing this project, I feel that VoiceThread is a viable option for online group presentations.

I would like to continue using VoiceThread in my online classes to spark discussion. In the future I will be posting more presentations on VoiceThread with questions embedded in the PowerPoint. So while students view the PowerPoint, they will be able to stop and ask or answer a question.


Debby Rubin

Debby Rubin, Ph.D. Social Work

Overview

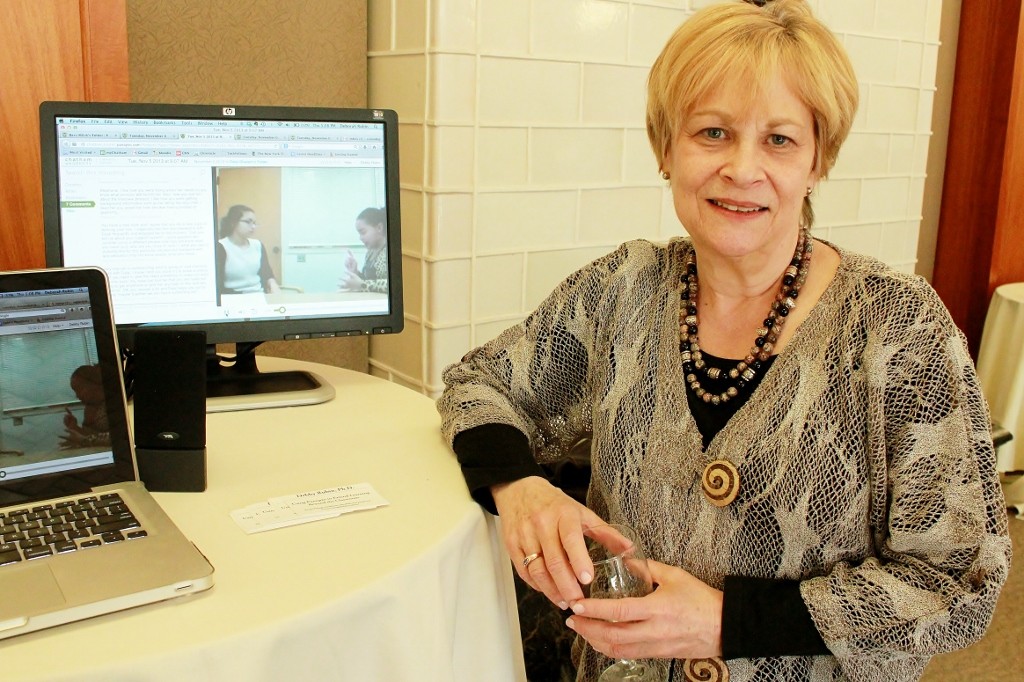
When teaching classes involving hands on skills such as interviewing and assessment, it is easy to dismiss technology as being impractical, inappropriate or just ‘not as good’ as traditional methods. When I considered how I wanted to use technology to help students develop their basic social work interviewing techniques, I realized that, despite this, I have always incorporated some type of technology. Years ago it was a classroom with an observation booth and microphones, later it VCRs and big bulky cameras. Until recently, access to cameras and other technology by students was challenging but now most of the barriers have been overcome. Since Chatham provides Macintosh laptops to incoming students, most have the capability to record assignments easily. Beyond that, I wanted to provide an experience where students became comfortable as critical thinkers about their own and others work. Developing interviewing skills takes practice but it also requires feedback from others. Students were often reluctant to provide feedback in the classroom beyond praise and there was never enough time to provide both didactic course material and frequent role-playing and practice.

Implementation

I decided to see if Panopto could provide a solution to this challenge. It provided an easy user interface for students to record role-playing and practice interviews as well as the ability for students to watch each other’s recording and make comments.

Panopto

Successes/Challenges

One immediate challenge was a part time Chatham University undergraduate who did not have access to a laptop computer because of her part time status. She was able to work with other students to use their technology and access to Panopto through the computer labs. In the end it was not a problem but did underscore the technology divide which might be more acute at other places. The support of the instructional technology department through the technology fellows made a positive difference in both my willingness to incorporate Panopto in to my class and students’ ability to use it effectively. Having Lauren come to class and help students get started using Panopto prevented many technical concerns and glitches along the way.

Assessment

Students reported that they liked using Panopto and didn’t seem to have the kind of difficulties I had seen in previous years (e.g. “the technology didn’t work”; “my video disappeared from my flash drive” etc.) which made it much easier for me.  The grading was also significantly easier because I could watch and comment on the videos from any computer or tablet. The quality of the student comments and feedback was much more specific than in years past, however, students still remain hesitant to give much constructive criticism to each other. Students’ performance seemed to be better and more polished than similar assignments in previous years but I am not sure whether using Panopto had anything to do with this improvement. Not everyone actually provided comments for every video even though it was part of the assignment.

Value and Next Steps

Doing this assignment using Panopto was valuable and I think added to students comfort level in interviewing. Some of this group will be completing a social work field placement next year and I will ask them if this technology helped prepare them. Now that I am more comfortable with Panopto, I will use it again and expand the number of videos that students complete. I would like them to do one at the very beginning of the class and one at the end as a pre/post measure.